

You wouldn’t drive a car without adjusting the seat, so why sit at your sewing machine without adjusting it to suit? Take the time to find the best seat in the house. When you unbox your new (or inherited) sewing machine, it’s tempting to set it on a spare desk or table, pull up the nearest chair and start sewing. Soon, you may notice that your neck, shoulders, wrists and back are sore. The problem is that the dining chair is designed for you to work and eat at the table, not 4″ above it. The average sewing machine is 3½” from bottom to sewing surface.
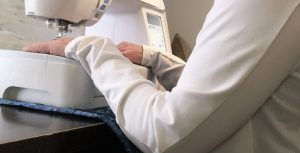 Poor sewing position.
We cannot always adjust our table, but we can adjust our chair. Think about how you sit when you are sewing. Position your hips all the way back in the seat with your feet flat on the floor. If the seat depth doesn’t adjust, place a cushion behind you for a quick fix. Run your hand behind your knees. There shouldn’t be any pressure on the front edge of the chair and your thighs should be parallel to the floor. Maintain a neutral spine.
Look for a chair that:
• allows you to adjust the height. If you can’t lower your table, raise your chair or add a cushion.
• has an adjustable back with lumbar support and an adjustable seat base depth. A cushion can also help here. Ideally, you should be able to tilt back when not sewing to redistribute weight on your pressure points; if you can’t tilt, then wiggle, shift or get up.
• has a waterfall edge at the front to eliminate pressure on the back of the knees which disrupts blood flow and circulation. Allow for a 2-3 finger gap from the front of the chair to the back of the knees.
• has removable or adjustable armrests. Position them just below your elbows to help keep your shoulders relaxed. No armrests are better than the wrong armrests.
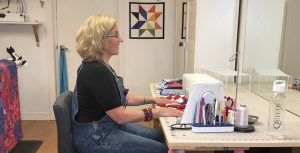 Good sewing posture helps you avoid back, neck and wrist pain.
While there may not be a perfect way to sit and sew, there is good posture and the best height for your sewing surface. Centre your body while seated in front of the sewing machine needle, sit tall with a neutral, natural S-shaped spine and relax your shoulders. Keep your upper arms at your sides and bend your elbows to 90°.
To find that perfect height, measure from the bottom of your bent 90° elbow to the floor to determine how high your sewing surface should be. If your sewing machine is too high, you raise your elbows, which forces your shoulders to scrunch up and your wrists to bend, causing back, neck and wrist pain. You probably need to either lower the table, or raise your chair until your hands are resting on the sewing surface with your elbows at 90°-110°. If your feet are dangling, place a box under the sewing table until they are resting flat and your knees are at a 90°-110° angle. The pedal should be directly under your foot.
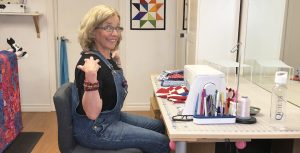
As you get into the zone, chain piecing one block after another, your shoulders tend to roll forward, your head leans, your neck is bent and your back is hunched. Not great! Instead, sit tall; roll your shoulders back, drawing your shoulder blades together. Don’t tense up. Relax your shoulders. When you stitch, use one foot for a bit, then move the pedal over and switch feet. And don’t forget to get up and stretch whenever you can.
For more helpful information about keeping our body at its quilting best, visit healthyquilting.com.
