

Finished size: 18″ x 24″
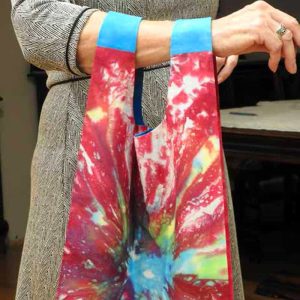
This pattern is for a market bag to keep in your purse for shopping. No more single-use plastic bags from merchants! It’s quick and fun to make using only three fat quarters. The pattern uses the same technique as a sleeveless, shell top, which finishes all edges without any hand stitching.
The finished bag washes nicely, especially if fabric is pre-washed before sewing. Sue recommends using batik or hand-dyed cotton lawn, which wears well and remains colourfast even after washing in hot water. Sue also uses polyester thread for strength.
NOTE Since the bag looks like a sleeveless top while in progress, the various parts of the bag are termed similar to a top: neck, armhole, etc.

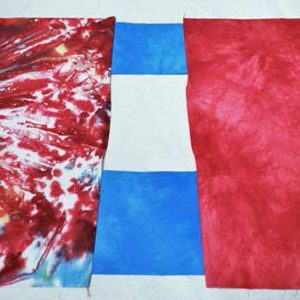
Three fat quarters are used in total, two for the front and back panels of the bag and a third for the facings and handle tops.
1 Trim fat quarters to 18″ x 20″ long (fat quarter pieces can be cut as long as fabric, but width must be 18″).
2 For facing, fold fat quarter in half, then fold in half again in other direction to make a 9″ x 10″ (or so) square. Use pattern drawing to cut neck and armholes for facing. From piece cut out for neck, cut two handle tops 5″ x 5½”. Finish straight (bottom) edges of facing using a narrow hem or lightweight binding.
3 Place 5″ edges of two handle tops along 18″ edge of one of the remaining fat quarters, right sides together (RST), with long edge of handle-top piece about ½” from outside edge of fat quarter. Sew using ¼” seam allowance. Press away from handles. Sew remaining 5″ edges of handle pieces to remaining fat quarter.
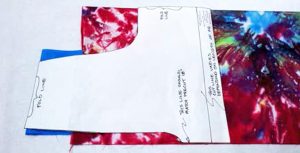
4 Fold bag in half lengthwise and again crosswise. Use Shell Shopping Bag Pattern to cut neck and armholes. Cut a 6″ x 2″ tab from one of the leftover pieces of neck (used in step 13).
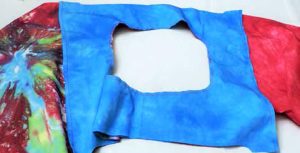
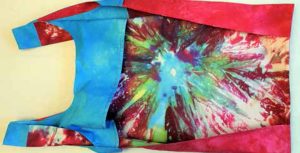
5 Lay bag, from step four, flat onto work surface right side up. Lay facing right side down over bag body, matching neck opening all around. Pin and sew neck opening using ¼” seam allowance. Sew around neck a second time near first stitching to reinforce. Clip seam all around, especially at curves. Turn out to right side and press.
NOTE: Do not give in to the urge to sew armhole sleeves in same manner as neck. This will only result in frustration; there is no way to turn the piece right side out!
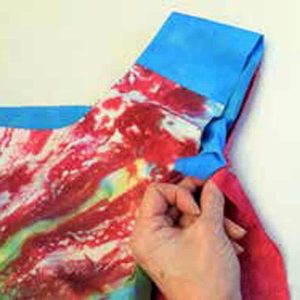
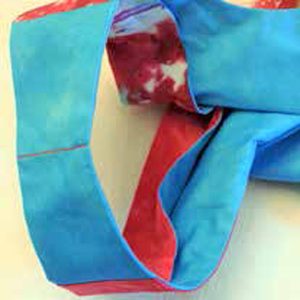
6 This step is the fun one! Doing the equivalent of climbing inside the little tunnel between the neck and armhole edges, the armhole seam will feel as if it is being sewn from the inside. Lay bag down on table with wrong sides together (WST). Pinch bag body and facing together at one of the underarm edges. Fold these edges over, so right sides of little part of underarm seam are together and rest of bag is out of the way. Keep holding these two pieces together and take to the sewing machine. Sew this seam RST, as you are holding it, but without being able to turn piece inside out. Start at the beginning and keep going. Trust that the two pieces are cut from the same pattern – they will line up at the end!
Start at edge you are holding, make a lock stitch. Without using pins, continue sewing armhole seam using a ⅛” to ³⁄₁₆” seam allowance, as far along seam as possible, which should be a little past half way. As seam is sewn, seam is being pulled through tunnel between neck and armhole. When seam cannot be sewn any further, cut thread and remove piece from machine.
Go to other side of same armhole seam and reorganize piece, so it is pulled out of other side of tunnel. Continue sewing seam to end. Clip curves if necessary.
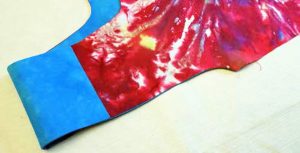
7 Repeat step six for other armhole. Lay bag out flat and press both armholes well.
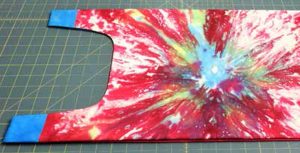
8 Sew sides together with French seam, as follows:
a Lay piece on flat surface WST, matching front and back. Pin side seams together, catching facings into seams.
b Sew with a ⅛” seam allowance. Trim if necessary, press and turn so right sides are together.
c Sew side seams again with ¼” seam allowance. Turn right side out, but do not press this time.
9 To make side creases, lay bag on cutting mat. Starting with one side, fold handle in half, lengthwise, by folding outside of handle under inside edge (i.e. folding armhole edge under handle to meet under neck edge). Continue same fold down to bottom of bag by moving side seams about 2″ toward centre of bag. Repeat for other side. Use rulers on cutting mat to ensure sides of bag are parallel and fold is same on each side. Also check there are no puckers and handle tops lie flat. Pin along raw edge at bottom of bag. Carefully transfer to an ironing surface and press folds into place.
10 Sew across tops of handles to secure folds in place.
11 Sew bottom seam with French seam as follows:
a With wrong sides together, sew across bottom edge with ⅛” seam allowance. If alignment of pieces does not allow ⅛” seam allowance, use larger seam allowance and trim to ⅛”.
b Turn so right sides are together, making sure folds both go to the same side of bag, corners are neat and entire bag is lying flat. Press.
c Sew again, ¼” away from first seam.
d Turn right side out and press.
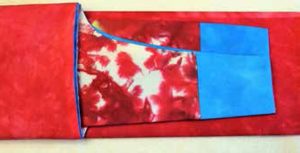
12 Fold bag in thirds, lengthwise, and press folds. Next, fold handle end down so it lies about two inches from bottom of bag. Starting at fold, roll bag up into small cylinder around 4″ x 2″ in diameter, which will fit conveniently into most purses. Unfold to add tab closure.
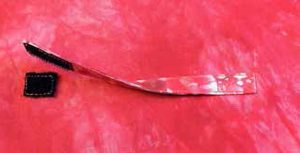
13 To make closure tab:
a Use 2″ x 6″ piece of fabric from step four, fold over ½” at both short edges and press.
b Fold in half, lengthwise, press and fold raw edges to centre to make a ½” x 5″ tab. Press well, use steam if necessary. Top stitch all around, about ⅛” from edge.
c Sew small piece of hook side of hook-and-loop fastener (such as Velcro®) to one end of tab.
d Sew other end of tab to centre of bag front 5″ above bottom seam. Orient tab toward top of bag, with piece of fastener facing bag.
e Sew matching loop piece of hook-and loop fastener two to three inches from bottom centre of bag, so it engages when bag is rolled up as described in step 12.
f Sew a second loop piece a few inches above tab, align with closure tab when lying flat. Use this piece to attach tab out of the way when bag is unfolded for use.
