

There is a whole lot of thread out there and it comes in all kinds of sizes and materials, but have you ever heard of iron fusible thread? This unique utility thread fuses fabric layers together when the heat of an iron is applied. How to begin to use it? As it turns out, this thread has many surprising uses which will make sewing life so much easier. Simply learn how to utilize its potential. As we like to say, sew smarter, not harder. Allow this article to inspire you!
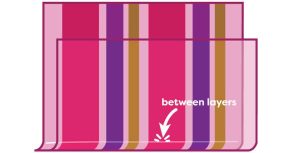
Perfectly Lined-up Plaids, Patterns or Striped Fabric
No sewing machine needed for this method! Simply lay a line of fusible thread on the right side of the fabric where the seam line will be. Then, take a second piece of fabric, lay it right sides together and make any small adjustments, so they are perfectly lined up. Once the fabric is laid out right, press with a hot iron to hold the layers together – without pins! There is nothing more satisfying than a pattern lining up exactly right – especially for those who are perfectionists!
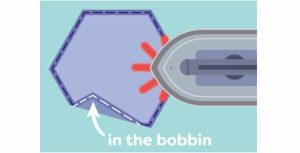
Raw-edge Appliqué with No Interfacing
To do this method, wind the iron fusible thread on your bobbin and use a regular sewing thread in the top. Stitch all the way around the appliqué shape, press with a hot iron and pull out the top thread. Using a small, sharp pair of scissors, trim away the excess fabric close to the fuse line. Permanently stitch down the appliqué with invisible thread (close to the edge) or a decorative stitch (that covers the raw edge). The result is a lightweight, natural looking appliqué without the stiffness of an interfacing. No more worrying about annoying puckering caused by pins, which can shift or distort the appliqué piece.

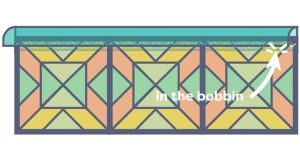
Perfect Quilt Binding
Take a prepared and folded binding and place it on the wrong side of the quilt. Set the stitch to a tight zigzag, load the machine with fusible thread in the bobbin and regular thread in the top. Sew down the length of the quilt. Turn the binding over to the right side and fuse it over the seam. Now that the binding is perfectly held in place, stitch it down, sewing close to the edge of the binding while being sure to catch the underside of the binding perfectly. This method eliminates the use of pins or clips! Quilt bindings will come together like a breeze and will never look so good!
Serging Turned Hems
Load the serger with fusible thread in the lower loopers and regular thread in the needle and upper loopers. Serge all the way around the hemline, then turn up the hem and fuse it in place. Turn work to the right side and stitch it down with regular thread (in both the top and bottom) for a beautiful, simple turned-up hem.
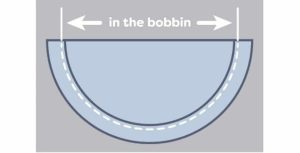
Perfect and Easy Curved Hems
Curved hems can often be a hassle to create, but iron fusible thread makes them much easier. Simply run a row of long basting stitches along the curved hem edge with regular thread in the needle and fusible thread in the bobbin. Gently pull up on the bobbin thread to ease in the shape of the curved hem, then fuse the hem in place. This method will make hand stitching hems much easier because it will not shift as it is stitched. Shifting can occur even when using pins. Work can also be turned right-side-up to machine stitch the hem without worrying about it being distorted
on the underside. Curved hems have never been easier!
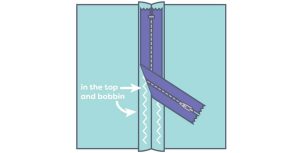
Placing Zippers
For many of us, sewing in a zipper can be the least favorite part of a project. No longer! To begin, baste the zipper opening closed and press the seam open. Run a row of zigzag stitching along both seam allowances, with the fusible thread in both the needle and the bobbin. Center the zipper under the seam and press both sides to fuse down seam allowances and fuse zipper in place. Stitch around the zipper without worrying about shifting. When stitching is complete, remove the basting thread which holds the opening closed. The zipper will be ready to use.
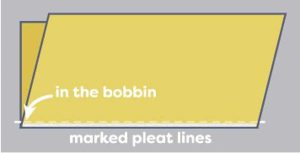
Making Pleats Crisp
For garment sewers who want a little extra oomph in pleats, iron fusible thread does a great job making pleats extra sharp. Mark both inside and outside pleat lines on fabric. Stitch a scant one-eighth inch away from the marked lines, with regular thread in the top and fusible thread in the bobbin. Ensure the fusible bobbin thread is on the inside of the pleat. Using a press cloth, press along marked lines to fuse the layers together along the pleat lines, giving them an extra crisp corner.
These are only seven innovative ways to use fusible thread to make projects easier to sew while giving beautiful, professional results. Which ideas would you use for your projects? We hope this article inspires quilters to bring this unique thread into their sewing toolbox!
Visit WonderFil Specialty Threads for a list of retailers or to order online.
