

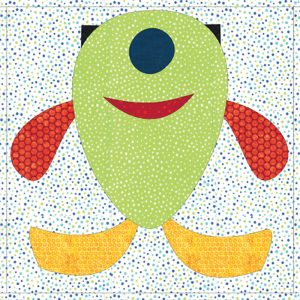
What are the favourite critters in your family? What would you like to put on a family quilt – a turtle, an elephant? How about a monster? Only you know your family well enough to choose and, luckily, Electric Quilt 8 (EQ8) has the tools to help you make a unique quilt. The best part – you will own the copyright!
If you have an older version of Electric Quilt, you may not realize how extensive the changes are in Version 8 or how much easier the quilt and block tools are! Whether you use a tablet or laptop, you can create your own block and quilt designs.
The desire to make a baby quilt is what inspires many people to get started on a hobby like quilting, and opportunities to make small quilts arise often. Why not try to design your own?
A good place to learn about the tools in EQ8 is the list under the Help menu. By clicking on the second option Online Support Articles, you can type in your search choice. Type Drawing Appliqué and click on the Enter key to see at least 20 articles on the subject. The first article demonstrates how to use each of the tools.

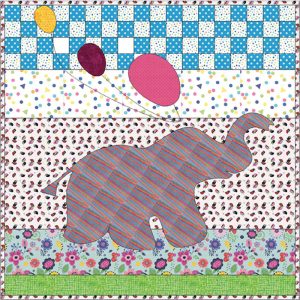
To design your own baby quilt, begin on the Internet and search for copyright-free line drawings to trace. The elephant and turtle in this article are examples of copyright-free images found on the Internet. An easy way to save an image is to right click on the image. A menu will appear.
Choose Save Image As and place it on your computer in the EQ8 folder for Images.
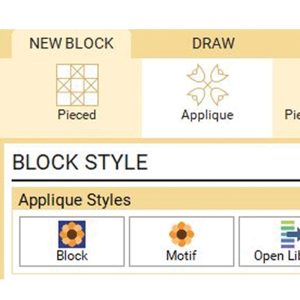
The next step is to start working in EQ8. Clicking on the House icon (top left) will always show the main choices. Choose Design a Block from Scratch.Choose Appliqué and then Motif.

The drawing box will appear on the right. The default size is 8″ x 8″. Since motifs can be resized when put into a quilt, the only reason to adjust the size is when the element to be traced is quite a bit wider than high or vice versa – you may want to change the proportions to fit into a square block better.
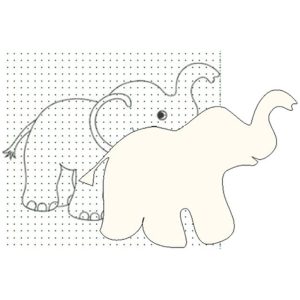
Use the menu item Tracing Image, then Import Image to import your image to the tracing layer. Until you have more experience, it is simplest to click OK when the image is on the screen. Click on the image to activate the four corner nodes, which can be dragged to enlarge or reduce the image size.
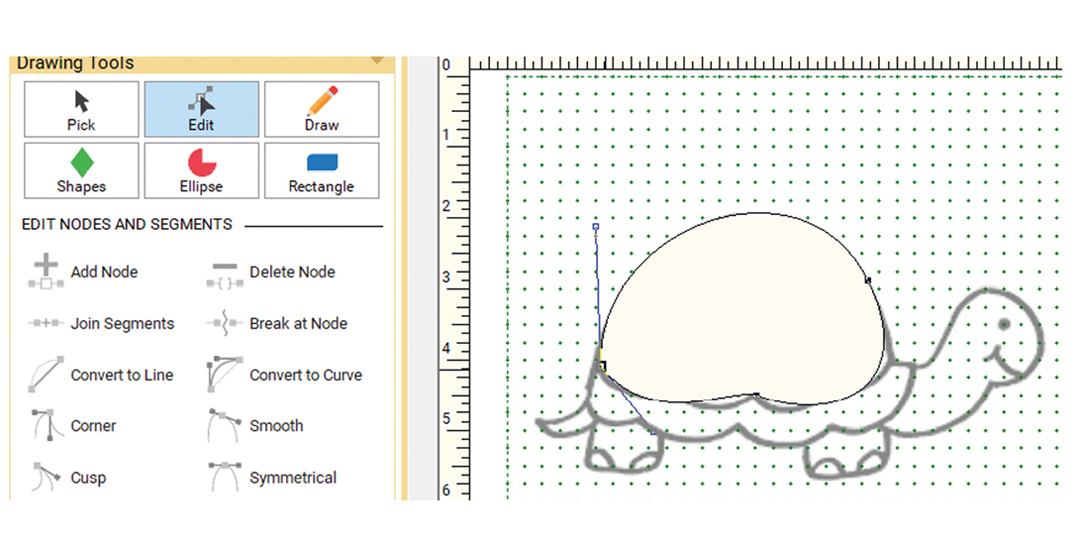
To begin tracing the image, click on Drawing Tools. This step is where the artistic challenge begins! The easiest trace method is to use the existing shapes built into the program. After drawing a suitable shape, use the Edit tool on any line to add a Node (three nodes were added to the drawing of the elephant to pull in the parts of the mouth). Nodes can flatten shapes, add corners, add sections, etc.
Choosing the Draw tool, then the Freehand pencil can be great for creating elements (shapes), but you could end up with an “open” drawing which can’t be coloured or printed as a solid patch because the outline is not completely joined. EQ8 solves this problem by adding a node tool named Join Segments. After drawing the shape, click on the Edit tool, then zoom in on the beginning and end of the shape outline. Click on one node, hold the Shift key, click on the other node and then click on Join Segments. If the shape becomes a solid colour then it has become a closed shape or patch.
The elephant was drawn as one shape with the Freehand tool. Once the shape was drawn, it was moved to be compared to the traced image and then moved back again. The turtle, on the other hand, was drawn as separate shapes, so each shape could be printed and sewn with separate colours. Another new feature of EQ8 is one of the tools on the left, Bring to Front and Send to Back. Using this feature enables the artist to place the appliqué. items in the order they will be sewn. Once coloured, they can be checked. For the turtle, the head should be sewn before the body, so the left edge of the head is covered.
It is important to save the drawing as you work; this can be done often to save the drawing in stages.
Creating the Quilt
Once the appliqué element (in this case a critter) is designed and saved, it is time to create the quilt! Click on the Quilt Worktable icon, then the menu item New Quilt. The first choice is Horizontal which is also the simplest choice.
Click on Layout in the menu. Change the number of horizontal and vertical blocks to one and change the size of the block to whatever size you want to make the quilt, e.g. 36″, 48″, etc. This step will give you a simple, one-colour background for your creation.
Another simple choice is the horizontal strip or vertical strip quilt. In both options, the user chooses Layout from the top menu. Click on a strip and, on the left, input the size of each layer. There is a choice here to change the strip style.
As with the earlier drawing, it is important to save the quilt when important changes are made.
These quilts are fun to design and sew. I hope you will choose a project like this simple baby quilt to start working with EQ8. Send me a photo of your project or ask any questions at lpmacdonald@hotmail.com
