

A. Making Binding
From the navy fabric cut 2½” strips across the width of fabric. Sew strips together along the 2½” ends until you get a long strip around 190″.
Fold strip in half, lengthwise, wrong sides together and press along long edge. Pressed binding strip should measure approximately 1¼” x 190″.
B. Attaching Binding
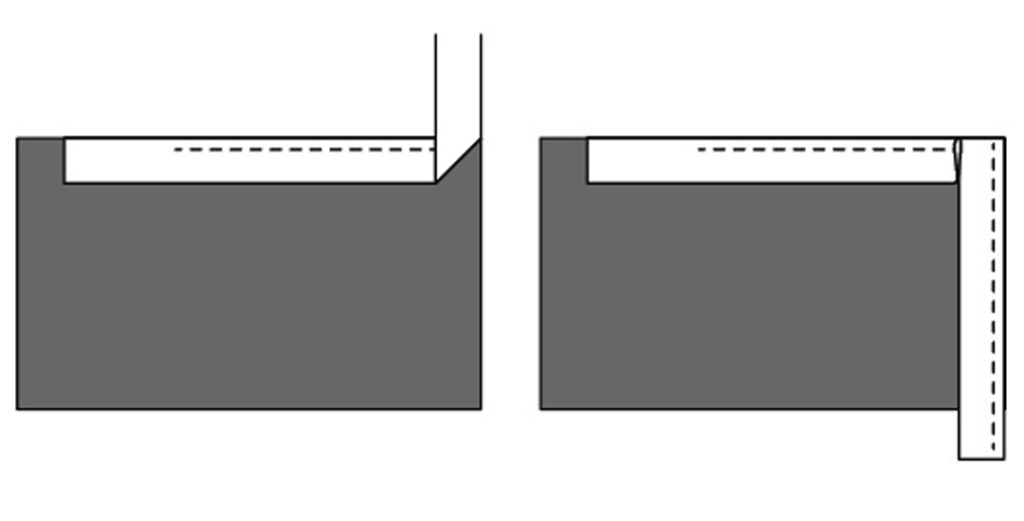
With quilt top facing up, leave 5″ of binding from edge (a tail so to speak), match the raw edge of binding to raw edge of quilt top edge and sew along edge using a quarter-inch seam allowance.
Corners: Stop sewing a ¼” from the corner. Lift needle out of quilt. Turn quilt 90°. Take binding strip and lay straight up, creating a fold right at the corner. Next, fold binding down on itself, laying raw edge along new side you will be stitching. Starting right at the top edge of the corner, begin stitching down the new side. Continue sewing using the same method on next three corners.
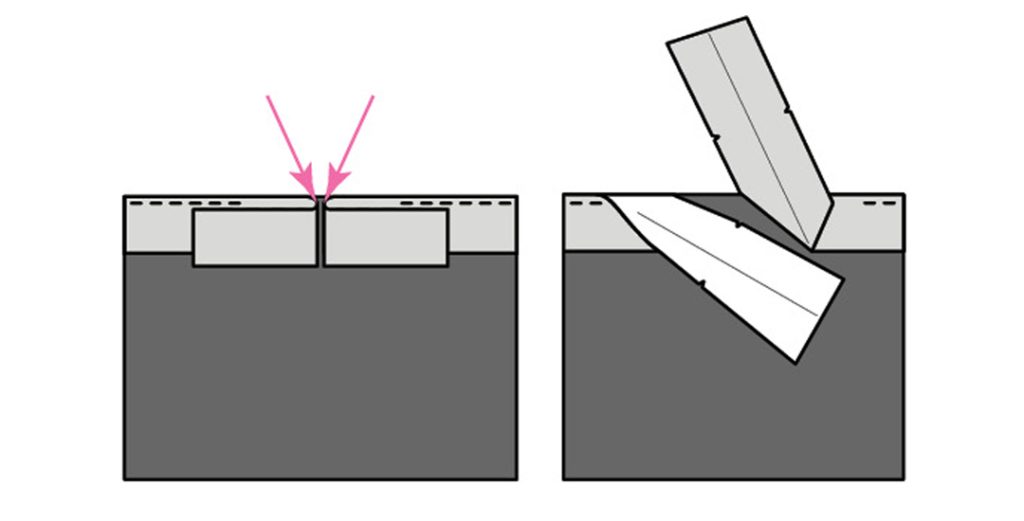
Stop stitching approximately 8″ from start of binding. Bring the tail ends together so they barely meet and fold each tail straight back on itself. Make a tiny, ⅛” snip on the folds (pink arrows in show where to snip).
Unfold the binding on both tails. Place right sides of fabric together, matching snips.
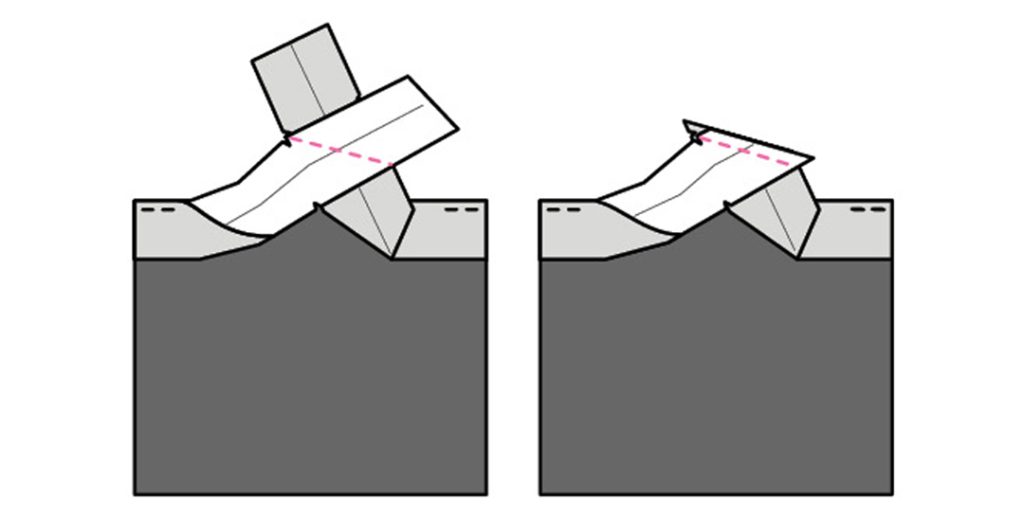
Sew a diagonal line across strips. Before trimming, make sure binding will fold back in half and that seam allowance is hidden inside fold. Also make sure there is no twist in the binding. Once seam is confirmed correct, trim seam allowance to a quarter inch. Fold binding so seam allowance is inside binding. Finish stitching binding to quilt.
Once binding is attached, fold over to back of quilt. Use clips or pins to hold binding in place. Hand stitch the binding onto the back of the quilt using tiny, invisible stitches.
