

Make this dazzling diamond quilt the easy way with the Sew Easy Half Diamond Ruler!
Finished size: 26″ x 33″
Supplies:
• Half Diamond Ruler by Sew Easy®
• Six to eight assorted-print fat quarters
• Two to three solid fat quarters
• One fat quarter for binding
• One yard fabric for backing
• 30″ x 38″ of Fairfield Quilter’s 80/20™ quilt batting
Cutting:
From the print fabric
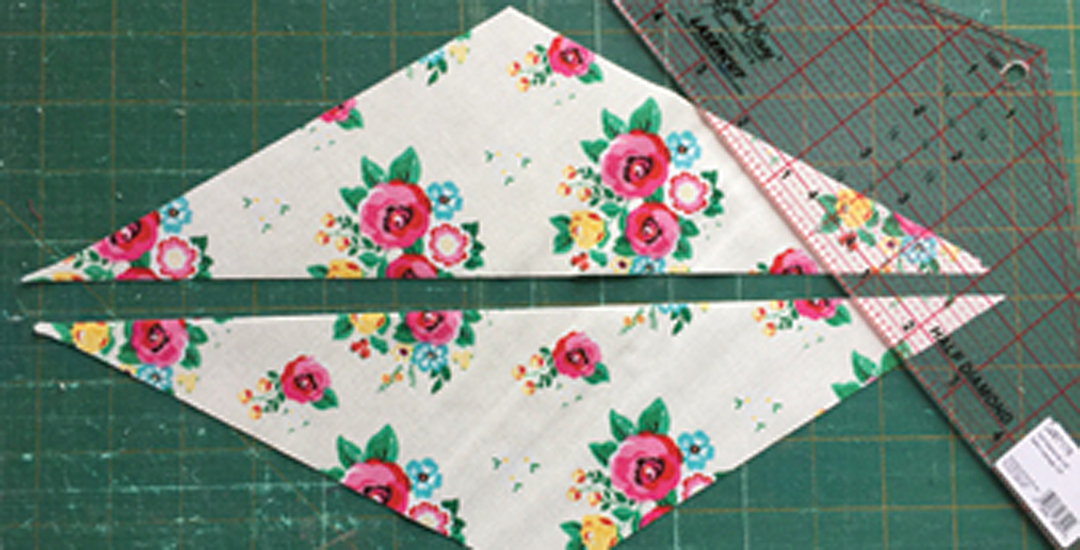
Cut seventeen 3.5″ diamonds using the Half Diamond Ruler.
Cut three 3.75″ diamonds. Then cut them in half, vertically. These vertical half diamonds will be the setting triangles along the sides.
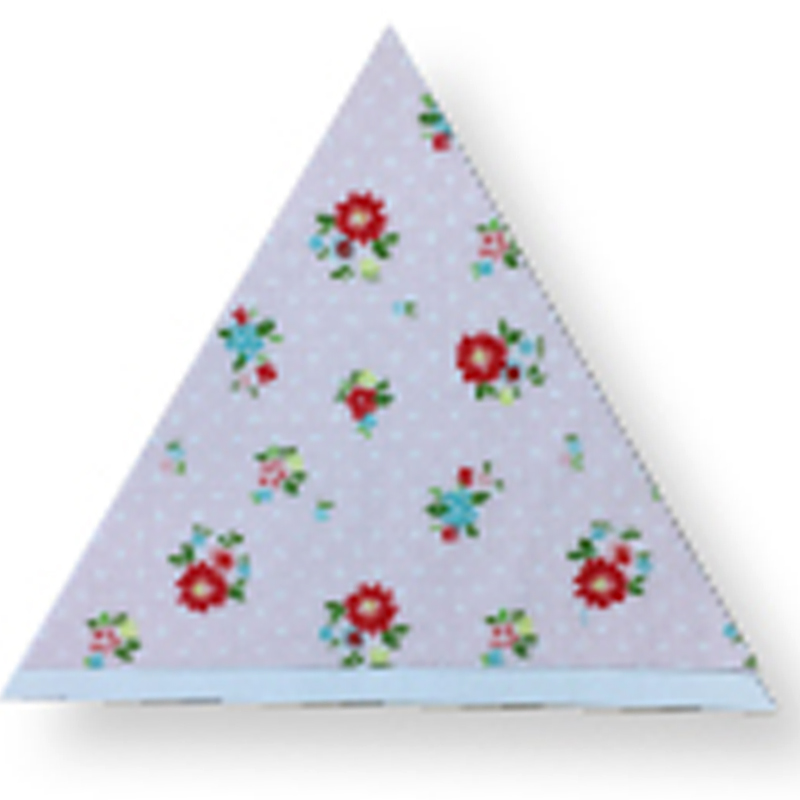
Cut one 3.5″ diamond from paper. Cut across vertically. Place on another sheet of paper, add ¼” to the bottom of the new triangle. This will be your template for the horizontal half diamonds
used to finish the quilt. Cut eight horizontal half diamonds using the paper templates. Place a pin on the bottom edge which has the extra ¼” for placement.
From the solid fabric
Cut seven to ten assorted diamonds measuring 2¼” or less.
To use the Half Diamond Ruler, fold fabric in half, place the ruler on the fold, matching the measurement of the size of the diamond you want. Cut the sides or angles along the ruler. If cutting a print fabric with a specific direction, fold the fabric so the top of your fabric is on the right of the fold and the bottom is on the left – the fabric is lying sideways to the direction you want.
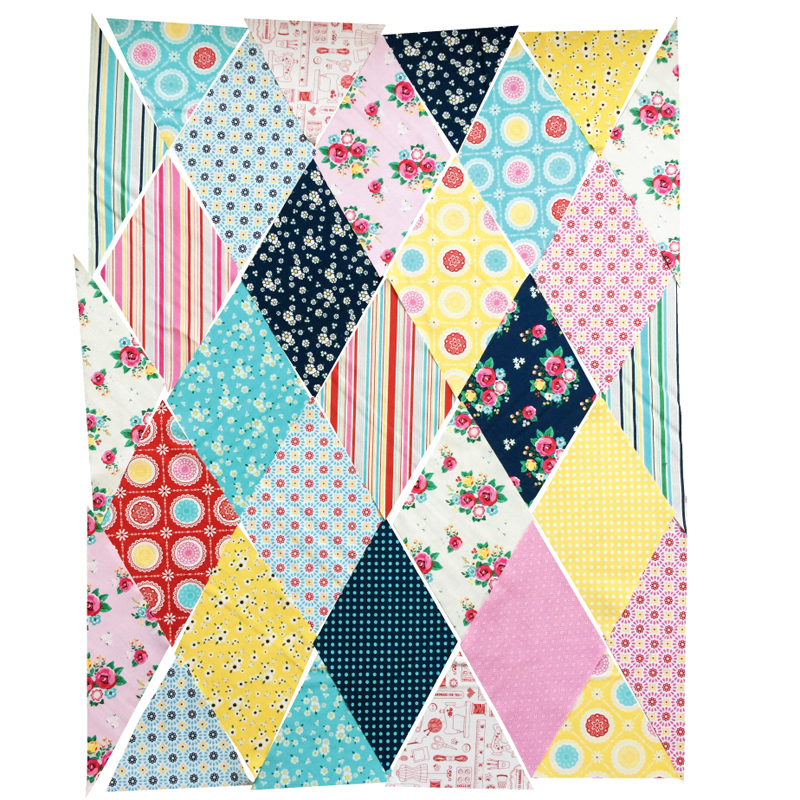
Lay the print-fabric diamonds in a pleasing manner, starting with three diamonds
in the first row and four in the second row. Repeat once, ending with one more set
of three diamonds. Add in the vertical and horizontal half-diamonds.
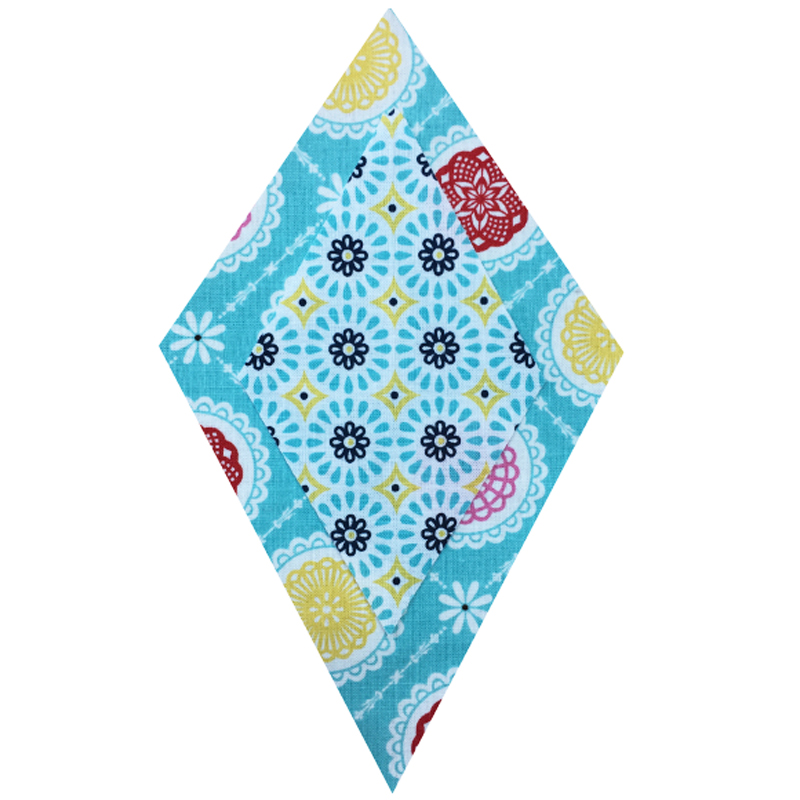
Place the smaller, solid diamonds randomly on top of the print diamonds. Sew the solid diamonds to the larger print ones. Use machine appliqué, a decorative stitch or for a fun look, use a simple straight stitch, but stitch it twice—after the quilt is washed this raw edge will have a slightly frayed edge. If using a heavy stitch, apply a stabilizer to hold pieces together and avoid
bunching. If you worry about the solid diamond moving during stitching, fuse it down prior to sewing.
To sew the top together, sew in diagonal rows.

TIP
To ensure the lines match up when sewing diamonds together, place two diamonds right sides together. Place a pin close to one end along the ¼” seam you will sew, flip back to see if it lines up straight—as it would if sewn. If it doesn’t line up, adjust the diamond, pin and check again. Once you are satisfied, stitch the two together. Press and trim.
Next, sew the rows together. Using the tip (above), check to make sure points match—adjust until satisfied, then pin and sew.
Quilt and bind in your preferred method.
Diggin’ the Diamonds was designed by Jackie White; find her on facebook at JackiesArtQuilts and on Instagram @jackiesartquilt. Fabric is by Riley Blake Designs.
