

Boro is a Japanese word meaning “tatters,” originally born out of poverty. Rural women would apply layer-upon-layer of indigo-dyed hemp with running stitches, also known as Sashiko, to patch clothing and bedding, which could be passed down from one generation to the next.
Here is an easy tutorial based on Boro techniques, using modern items, many from the thrift store. Besides making a good decision for the planet, you will learn self-care by sitting quietly and doing some slow stitching. Environmental awareness is high on the agenda of today’s younger generation and we should all be rethinking overproduction and the throwaway culture. It is encouraging to see people want to learn about fixing and mending again, especially youth.
Requirements
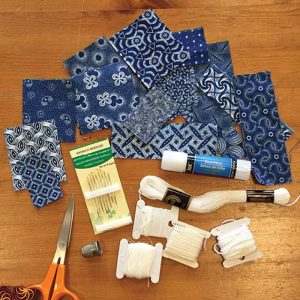
- Clothing for mending, such as jeans from the thrift store
- Patches of cotton fabric, which could also come from the thrift store
- Glue stick, washable
- Sashiko or embroidery needle(s)
- Thread (embroidery floss or Sashiko thread)
- Thimble
- Pair of Scissors
Directions
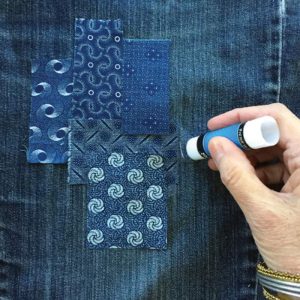
1. Position patches of fabric over the worn spot(s), overlapping in a way that pleases. Glue lightly into place.
2. Cut some embroidery thread measured to the length of your arm.
3. Split the six-strand thread into two lengths of three strands each.
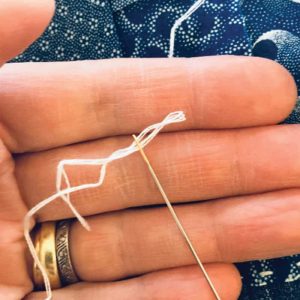
4. Thread a needle by folding the thread back at the tip to create a loop, then pinch the loop between your thumb and forefinger to insert the flattened loop into the eye of the needle.
5. Make a quilter’s knot at the end of the thread as follows: wind the tail end of the thread around the tip of the needle, then pinch the wound thread and needle between your thumb and forefinger of one hand, while pulling the needle through the twisted thread until a knot tightens at the end.
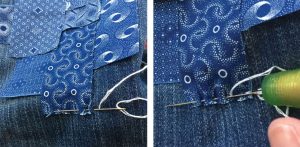
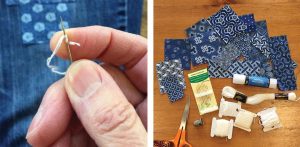
6. Start first stitch from the inside of the garment, so the knot sits firmly.
7. Create running stitches by rocking the needle in and out of the fabric, then pushing the needle though with a thimble.
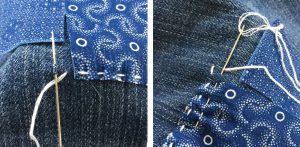
8. At the end of each row, make a turning stitch on the inside of the garment and stitch back in the opposite direction.
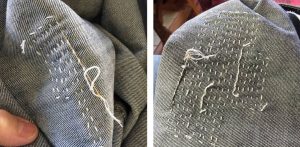
9. When the thread is too short to continue, push the needle to the inside of the garment and end off by burying the thread through the backs of the running stitches on the inside of the garment, before snipping off the excess tail.
10. More layers of patches can be added, or try adding stitches going 90° across the first rows of stitching.
Céleste Compion is owner of Meerkat Shweshwe, an online quilt shop specializing in Shweshwe fabric. Céleste also wrote a fascinating article about Shweshwe fabric.
